2009 Re-Energy Solar Oven
Challenge Submission Showcase

Our most popular year to date, 16 schools participated in the 2009 Solar Oven Challenge. 

Banded Peak School, Grade 7
Bragg Creek, AB

Oven 1
The solar oven project was given to us by our science teacher and took us about two months to complete at school. During this time, we worked on other things while we waited for the sun to shine so that we could test our solar ovens. It was a long process that started with collecting and measuring boxes and then spending the afternoons cutting and gluing until we had panels to build the funnel to absorb sunlight. We used duck tape to tape these panels into a funnel and then we found a box and assembled our solar ovens. We saved paper and shredded it to make insulation for our solar ovens and painted tinfoil cooking tins black to absorb the sunlight.
We ran into a few difficulties on the way to completion: we ran out of tinfoil, paint and glue, the paint and glue mixture wouldn't stick the cooking tins, and the duck tape wasn't the best at keeping our solar ovens together. After many fix ups and redo's, our solar ovens where completed and we tested them on the first sunny day that came along. We found that the solar ovens heated up pretty quickly to an average temperature of about 300—350 degrees Fahrenheit. We used this knowledge and found recipes to cook in our solar ovens. Many people were not very creative and cooked s'mores. We chose a recipe for chocolate chip cookie pizza. It sounds disgusting, but they turned out well and we topped them with fruit, chocolate sauce and smarties. All in all, this entire project was a fun use of science class — much better than taking notes, with tasty snacks as a bonus.
Oven 2
For our project we created a solar oven. It was an individual project where we were put into groups of three to make the solar ovens. The solar ovens were made during school time; we made them with a box that had four panels that were covered in tinfoil so it would attract heat. In the centre of our solar oven, we had a tinfoil dish that was painted black so it would attract the sunlight. The purpose of the solar ovens was to prepare and cook food without using any electricity to save the environment. To cook the food, we used the sun's thermal energy to heat our solar ovens, which then cooked our food. When building these solar ovens, we learned that conservation of energy is very important and that a small thing such as the solar oven can make a big difference in our environment.
After completing this project, my group has discovered that when cooking in a solar oven it takes patience and time to allow your food to cook, when using the sun's heat. Another thing we discovered to help your solar oven gain heat faster and easier is you can tip your solar oven towards the sun's rays. The reason for this is because the more rays that reach the solar oven helps cook the food faster, and by tipping it you are allowing all the sun in that direction to heat the food.
One building tip that we have for building the solar oven is when pasting tinfoil onto the cardboard sheets, remember to make it as smooth as you can and not allow any crinkles in the tinfoil. The reason for this is so that the sunlight can reflect better off the smooth foil allowing it to collect more rays of sun, which heats up the solar oven faster and hotter. Another tip to building a great solar oven is to make sure there are no cracks were light can escape, the reason for this is it helps the solar oven warm up faster and also helps improves its ability to collect heat and cook the food. Overall after this project my group found that is was an interesting experience, and a good use of class time.
Oven 3
Our solar oven model was built in a way that the top opened and the bottom was a small enclosed space where the food was cooked. It was hand-made out of materials such as cardboard, tin foil and glue. The solar oven we built did not have a large volume, but we were able to put enough food in small quantities for about four people. This project was constructed by a group of three grade 7/8 students. It was made to cook food using less energy, as we learned to be more environmentally friendly.
One issue we encountered while making the actual solar oven was that the cardboard curved inwards and was not as straight as it should have been. This caused our solar oven to have holes on the sides, where the light could shine through and the heat escape. When we were testing the oven, to see how hot it got, it didn't heat up to a very high temperature. Our group thought there wasn't enough sunlight shining on the oven's base, because of the many shadows within the oven. Overall this project was a success, and we had a lot of fun making it.
Oven 4
Our solar oven had not heated properly on test day, because our bag was not airtight and it wasn't properly tilted towards the sun. On cooking day, it heated at the same pace as everyone else's and then some. Also, we had finished before all of the other groups. However, the smores were disgusting. Even though normally smores are AH-MAZING, ours tasted like the black paint that we used to coat the inside of the oven tin, and the plastic of the bag that we put the pan in. It was really cool to watch the bag inflate with the hot air collecting in it at the beginning of the cooking day. The solar ovens were generally successful. Sure, we could have been a BIT more creative but sometimes it is the classics that get the best results! The smores were so yucky. We hated them very much. But the solar oven worked really well to melt the marshmallows. The marshmallows were really gooshy. We also thought that the other groups smores were kind of sort of maybe kind of sort of maybe a tiny bit better. The solar ovens were extraordinary!
Oven 5
We did the solar oven challenge, which means we had to cook something in our oven. Our group cooked a cheesy bean dip/meal, and it was cooked and a success. The reason for the success I think was that it was in the direct way of the sun so it could bounce off the aluminum foil to make its way to the tin tray in the bag and in the painted tin. This resulted in heating and cooking the food. I also think that we could have picked something that was easier to cook like quesadillas or anything that is a good meal but involves less. The plastic cover helped cook the food because the sun would heat up the cover which cooked/heated the meal. Another reason why the coking wasn't as successful as it could have been is because the insulation is just shredded paper and nothing more advanced.
I think that overall our cooking was a great success because the heat was bouncing off the sides and heated the tin with the cheesy beans in it and cooked the food and it didn't take that long.
Oven 6
We have been making and preparing solar ovens for about the last month and a half. Our oven worked very well on test day and on cooking day. I think that next time we should have definitely challenged ourselves more on what we were cooking. We cooked s'mores and we managed to make two delicious batches to eat and share. As successful as we were, I would have been much happier if we made something harder, like meat, and did okay, than do excellent but make something really easy. The building of our oven went flawlessly. We had enough cardboard and the instructions were fairly easy to understand.
The most challenging part was painting the larger tin box. We could never get the black paint to a perfect viscosity when the paint would not run down the walls. From this project, we learned that after light enters through some substances (like plastic bags) they can't get out, therefore creating a greenhouse effect. We also learned that the ray of reflection always equals the ray of incidence and that is why the mouth of the solar oven is slanted in, so that more light and therefore heat is directed to the cooking chamber. We also learned that a rough reflective surface does not reflect light properly, but disorders it in every which way. I think that overall solar ovens were a successful experiment and it would be a good learning experience for the grade sevens next year.
Oven 7
Our solar over was built for a class project. We all built the same design; square shape with tin foil on the inside with a black, metal tin in it to hold the food that we needed to cook. We built the oven by cutting triangles out of cardboard and coated them with glue and spread the tin foil on as smooth as possible so the sun wouldn't be reflected off all of the small surfaces. When it had dried, we taped the four triangles together, and we placed the square in a small box so our oven would stand up and we filled the box with shredded paper for insulation. We painted a foil tin black so it would absorb the heat of the sun. We placed the food in a smaller tin and put our solar oven in the sun.
We had a bit of trouble with the heat in our oven because we didn't factor in the fact that the sun moves across the sky so it moved away from our oven. We still got our oven up to 150 degrees Celsius, even though there were some clouds. When you make a solar oven, make sure that you angle the oven towards the sun so it can get as much light as possible. Also keep in mind that you should try and make the paint on the tin foil tin as even as you can make it so the heat is evenly distributed. Most important, make sure you have lots of fun!
Oven 8
We believe that the most important thing if you want to have great results with your solar oven is that the tinfoil on the inside is all extremely flat and has no wrinkles. This will make sure that all of the heat that enters the oven goes directly to the food and that no heat escapes. Our model had four sides with two of them measuring 65cm, 30cm, 60cm. The second two should measure 50cm, 60cm, and 15 cm. We also filled the bottom of the bow with shredded paper so that the container will fit right at the bottom of the four walls of tin foil. This way, absolutely minimal heat and energy will escape the oven.
I learned that solar ovens are a very effective way to cook a simple meal that doesn't need tons of heat to cook. It also is a very inexpensive and fun project for almost any grade level or age. Our biggest challenge was trying to find a box that was the perfect size to close off the bottom of the oven. One thing that I found was very fun and exiting was when we had to put the tin foil onto the cardboard. This was fun because it really showed who took their time and really cared about the success of the project. It was also really funny when people screwed up and had to redo or reconstruct something.
Oven 9
As a whole, our group agreed that this was a very cool and fun project to work on. It was also agreed that our group got along and worked well together. Our group cooked some nachos and cheese, and they seemed to be a hit, at least among our group. I learned just how much heat could be created just by reflecting light onto a centre location. I think that our group did a fairly good job in making a solar oven that did produce results, but I think that some things could be improved on. First, we could have done better by smoothing out all of the wrinkles, creases, and folds to create more heat. With the tinfoil, we also could have overlapped on the edges and sides so that every yocto meter is covered (yocto = y = 10—24). Improvements to our solar oven would be to bind the cardboard fans better together so that it didn't fall apart as on several occasions the tape was starting to come off. Another improvement could be on the food that we cooked. With two months to devise a recipe, nachos and cheese is very unimaginative. When we tested our solar ovens, ours got to above 150oC/300oF, or in the range of a conventional oven, meaning that we could have done something like cake or lasagna, not chips and cheese.
Oven 10
Our group made a Smore Surprise that consisted of Graham Cracker, Chocolate, Marshmallows and the surprise cookie dough. The hardest part of all of this was the making of our solar ovens. We first assembled our ovens by simply following instructions. We had a small problem with the black paint that was supposed to cover our baking chamber. Once we found the solution which was to add LESS water, that was pretty simple. The next thing we did is finish assembling our ovens, then we went online and found a recipe that we all thought would be really satisfying and something that we ALL could agree on. Afterwards we split up the responsibility of getting the items. When cooking day rolled around, our group was prepared. We started assembling our recipe in the oven and then we got a direct beam of sun onto it. Before we knew the chocolate and the cookie dough and the Marshmallows were melted. Our group then took it out and enjoyed a nice feast.
Oven 11
It was a very interesting experience building the solar oven. Imagine being able to cook something, without electricity, wood or gas, in a box! The most important thing we learned was how you can harness the power of the sun, which is such an available commodity, to cook food. One of the challenges that we encountered was getting the proper materials and assembling the oven, particularly working with the foil and getting it to stay on. We discovered that it is important to make sure that the foil is completely flat. You also need one sheet of foil for each side. Make sure that the cooking bag is flat and evened out. Also, try to cook something that won't take a long time. We recommend not to cook a roast! The heat only hits the surface so choose something to cook which is best cooked from the top through to the bottom. Your food can't be too thick.
This method of cooking is easily transported so could be used for camping and hiking. It would also be great for those who don't have or cannot afford electricity or gas to cook. But you need to be patient because food may take a long time to cook. You may want to pack along a chocolate bar or two to keep from starving!
Oven 12
Recently at Banded Peak School we started a solar oven challenge. We built the oven so that we would be able to cook something simple like smores or fondue, using power from the sun. We did this activity in groups and in our group we decided to make chocolate and cheese fondue. We built our oven with cardboard and aluminium foil. While we were building, we experienced several difficulties because we didn't cut the cardboard exactly how it was supposed to be cut. Even though our solar oven works just as well as the others, you should be careful and measure your pieces carefully before you cut them out. The most fun part of this project was when we cooked. This was a really fun challenge that required lots of team work.
Oven 13
During Science class one day, our teacher Mr.Churchill decided we were going to build solar ovens and cook something in them. We built a solar oven that had four panels with tin foil on the inside. We attached a box at the bottom and filled it with shredded paper for insulation. We then painted a cooking tin black and added a smaller cooking tin (where we cooked our food.) Before we started cooking, we noticed that our box that had the insulation in it was to low because our black tin with the smaller tin in it was not touching the sides and was not collecting all of the solar heat from the sun. We discovered if you moved the panels up from the box you would collect more heat if the tins were touching the sides of the box.
Oven 14
A solar oven is an object that uses the sun's rays to heat up something. It has a four-sided opening where the sun's rays are focused from tinfoil to the bottom where the food is. The model was built for a class activity referring to the school unit of light. Groups of 4—5 participated in the challenge to make a solar oven. Our group learned that if your tinfoil is completely flat, it will reflect more light to your food. It also helped if you tilted the solar oven at the right angle to get the most possible amount of light in. If the bottom was black, it would heat up more and would give heat to the food from underneath. This was helpful and made the food very hot, rising sometimes if it was a hot day to a whopping 180 degrees! You could probably cook anything with that temperature. That was why our group enjoyed it because we could make something that we could cook in and we were pretty impressed at the temperature. We thought that if you were in the wilderness and had to cook something, this kind of thing could come in handy.

Christ the King Elementary, Grade 4
Whitehorse, Yukon

Our grade 4 class built solar ovens and displayed and tested them on Earth Day. It was a class project and part of our energy conservation unit. With help from parents, the students built 5 ovens. They also wrote announcements to be read over the PA for all of Earth Week that included energy facts and conservation tips.
The students learned about how solar energy can be used as an alternative source of heat and ways that they can reduce the amount of energy they consume at school and home. They really enjoyed the construction day and working together to follow the instructions. Cutting the cardboard was the most challenging part as well as keeping the foil smooth.
The students displayed and presented their projects to other students in younger and older grades. It was a clear yet cool day with lots of snow still on the ground. The ovens were successful, and groups enjoyed eating their nachos and smores.

Crestwood School, Grade 4 to 6 Medicine Hat, Alberta

Oven 1
We built the box oven for individual uses in a recycling club at our school and for fun. You need to make sure all the sides have tinfoil. We got to make our own recipe! We had a contest to see whose oven worked the best. We got to make up our own team names. We got to work with our own partners and there were three groups competing. We really got to use our imaginations with the recipes. The recipes were hard to think of but we made it through. It took my group about 2 hours to create and 1 1/2 to bake cookies and marshmallows. It was very hard to create, but we had fun. It took a while to make, but it was worth it. I feel like all kids should be doing this, but only six were interested in it. Isn't that crazy out of 200 kids only 6 wanted to (but it is out of grades 4 to 6).
Oven 2
We built the box oven. We did it in an individual group. We built it for fun. Make sure that you put tinfoil on all sides of the box. Do not spray paint too much. We got to create our own recipes. We are going to test them soon. We will see whose Solar Oven worked the best and whose recipe was the most creative. We got to work with a partner so that was really fun to have someone to work with. We kind of had a contest at first to see whose Solar Oven worked the best. There were three groups competing. Last year, I really wanted to do this project but I was so busy with my social life that I couldn't do it. This year is my first year with this competition but so far it has been extremely fun. It took us about two hours straight to build our Solar Oven. But it was definitely worth the while. So far it has been really fun working up to this point. If I can I will definitely do this next year. I feel that all kids should be involved with the environment. I think that anybody would like it. It's just been really fun. I really like working on this project. This year I have been a lot more involved with the environment.

Don Valley, Grade 7
Toronto, Ontario

Oven 1
Our solar cooker is a box cooker but it has something to funnel the heat in. We had 2 boxes, one just a little smaller than the other. We put the smaller box into the larger one then put newspaper in the gap between the 2 boxes. Later we covered the inside of the smaller box with tinfoil. Then we made an open rectangular lid which funnels the heat in. We chose the design of the box because it would be able to funnel and trap heat in at the same time.
We have discovered how to trap heat and gain heat as it traps it. The tinfoil to reflect heat will make the particles move faster to make it warmer. The challenges we encountered was that our group didn't all work.
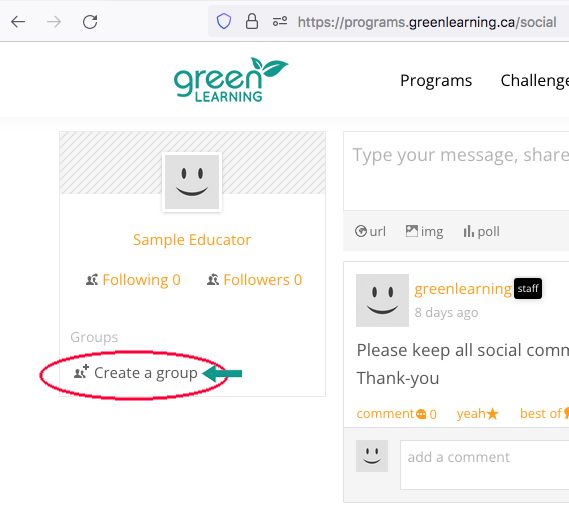
The fun part of our project was that we got to work together in a group.
Oven 2
At first we had a design copied off the Internet. We were going to use that at first but it was too hard, so we created a whole new design that was easier and looked like it was going to work. The model we built was a model we made up by our selves. After we built it, it did work and was effective.
Oven 3
We made a Solar Funnel Cooker. Here's the simple version of how it works: The reflector is shaped like a giant funnel, the shape of the funnel serves to reflect sun rays and gather them in the desired spot. You may have noticed that it works somewhat like the parabolic cooker, except that the sunlight is not concentrated to a single point at the bottom, instead it is concentrated along a line along the bottom, so it will not burn you even if you touch it. This is one of the major reasons why we chose to build a funnel cooker - because it's safer than a parabolic cooker. Also, this solar cooker just looked unique and stood out from the others while we were searching for which one to make.
While building a Solar Funnel Cooker, we encountered many challenges, which we managed (somehow) to overcome. The first of many was that we couldn't find a piece of cardboard big enough for the model. In the end, the solution was actually quite obvious and simple. We just put two pieces of cardboard together and voila, the first step of our Solar Funnel Cooker was complete. Another part where it was quite troublesome for us was when it seemed impossible to fold the cardboard into a funnel like the instructions told us to. Thank goodness our teacher taught us how to flatten it out and break the corrugation in the cardboard that way. It became a lot easier to fold after that!
It was interesting finding out how solar cookers worked. I never realized just how much we could utilize solar energy before this. During the researching phase of this project, we found out that this inexpensive yet effective solar cooker can be used for everyday cooking where electricity is not available and even fuel wood is getting scarce. The BYU (Brigham Young University) submitted a patent application for this invention, mainly to insure that no company would prevent the wide distribution of the Solar Funnel Cooker. They made no profit off of it, and I find that worth mentioning as well as simply amazing.
Oven 4
The project model that we chose is a solar box cooker. It is made up of two boxes and one is smaller than the other. Our group chose this design because we thought it was simple enough to build. We thought it might be better if it can cook from the inside and not out in the open.
We learned that when building our solar cooker we should always read all the instructions before starting to build. Therefore we wouldn't make any mistakes. We should also check that we have all the materials we need. There were a few challenges when building the box cooker. For example, we did not have all the materials needed so we had to improvize. We also needed to make sure that we cut straight lines and make sure that all the sides were the right measurements.
We liked gluing all the materials to the boxes and had fun cutting them to the right size. Working in a group also made the project go faster and more enjoyable. I think the most important thing that we learned was that to build a solar cooker, or any project for that matter, you must all get along in your group.
Oven 5
Model: Minimum box solar cooker, regular pizza box, main flap glued shut, extra box shell glued to bottom for extra insulation. Flap cut 2 inches away from each side in top of box. Aluminum foil glued to under side of flap, inside of box. Large panels cut and added aluminum foil. Placed inside. Can be removed for portability then replaced.
Things I learned: how to use an exacto knife, how to create a safety edge, how to use a heavy cutter and how to apply aluminum foil to cardboard. I don't have any tips, and it was fairly simply.
It was fun to mix the water and glue in a 3:1 water-to-glue ratio. Then to apply it. Also, it's fun working with a partner.
Oven 6
The materials we used for our project: aluminum foil, wires, cardboard, glue,
cookie sheet. The perfect description for our project is that our project looks like one of those Chinese straw hats, but upside down. The reason why we decided to use this model of solar cooker was because we thought it would be quite simple to make, easy to work and would have some of the best results.
When building our project, we discovered that we had to find a new way to attach the pieces together because the way the instructions said to do it seemed harder than we thought it had to be. We also learned that making a solar cooker takes time and patience. One of the challenges we encountered was making sure that every piece of cardboard was the exact same size.
Something fun and exciting we liked about our project was when we had to cut the pieces of cardboard into triangular forms. The reason we enjoyed this part of the project was because the machine we used was very easy and fun to use. It also made the cutting process short.
Oven 7
The project model I chose is a twelve-sided solar cooker. I chose this model because it looks really simple and not to hard to make.
By making my twelve-sided solar cooker, I improved my measurement skills and I learned what tools I need to make a straight line and so on. The problems I came across while making my project were making sure that all sides were measured correctly and I was using the right cardboard.
The thing I will enjoy most is cooking the cookies and possibly getting the prize. The thing that was the most exciting for me was cutting the cardboard and seeing that most of them came out perfectly.
Oven 8
Our solar cooker consists of three pieces of cardboard. The cardboard is covered with sheets of aluminum foil which is taped and glued to reflect the sunlight and heat. Our solar cooker has corners and sides that are cut and bent to get an angle to reflect the sunlight towards the food from many locations. The cardboard is also painted black to attract and absorb heat. Our solar cooker can cook without greenhouse closing. The reason that we have chosen this design is because the solar cooker is light, portable and not to small or big. It will fold up nice and easily without breaking or falling apart and could be changed to get maximum heat according to the sun's altitude setting (low sun's altitude setting, high sun's altitude setting). The solar cooker can reach up to high temperatures. Also, this solar cooker is complicated to make so we wanted to challenge ourselves.
What we learned in building our model is to be very delicate when handling aluminum foil because it will rip and get wrinkled easily if you don't put precaution into you work while attaching tape or glue on it. We also discovered that putting the color black around or on the solar cooker will help collect and trap heat during the process of cooking. Some of the challenges we have encountered were to repair the wrinkles and rips we made on the aluminum foil and deciding what type of miniature food we could make. Another challenge we faced is how we are going to improve it more.
Making the project was really fun because since this solar cooker was made by two people, it was fun working together. We both always worked together if we made a mistake and there is no stress because we don't have to count on only ourselves, we can count on each other to make a better and more created work. Something fun about our solar cooker is that when you look at the aluminum foil like a mirror, your face looks very weird because when you see your reflection back at you, the wrinkles on the solar cooker interferes and it makes your face looks unnatural. Also what is exciting for us is the suspense to know what our solar cooker could make and how hot it can be at its maximum. It is exciting to figure out if the solar cooker will work and if it will cook foods differently than other cooking devices.
Oven 9
Our project model started out as a simple pizza box. We decided for extra insulation to add another box under and fill it with crumpled newspaper. We then added two cardboard pieces on the sides of the box to trap the heat better and to rise the temperature. We chose this design because it was simple, straightforward and we knew that we could've modified it and made it better.
While making this project, we learned some tips about building a solar cooker. We learned that it's good to crumple up newspaper and put it in some spots of the project because it makes the food you are cooking hotter.
We like how our project had two extra panels with aluminum foil around it so that it attracts more sunlight to what we were cooking. We also like how we crumpled up the newspaper for extra insulation. During this time we learned how to attract and trap heat. It was a very enriching experience.
Oven 10
Well, our project takes the shape of a rectangular cardboard box. On the top there are four flaps wrapped in aluminum foil, and a plastic cover. We added a door to one side, and inside we insulated the sides and bottom. Our solar cooker works by placing food into the oven and then releasing the flaps to reflect the sun's rays onto the plastic. We painted the outside of our oven to attract some sunlight. We chose to use this design because it looked easy to make, and it's a great model to personalize in our own unique ways.
A major thing we learned about is using insulation. Using insulation protects our oven from heat loss. In our case, we used newspapers and cardboard to insulate. We also learned several different ways to keep our flaps up. We could use string, cardboard wedges, or maybe even Velcro. There were small disadvantages such as the glue not drying quickly enough, or our paper and aluminum foil ripping....a lot. Sometimes when we couldn't personalize our oven the way we wanted to, we had a little difficulty thinking of ways to change our "plan." Otherwise everything went well.
We had a lot of fun working on this project together. We had fun personalizing our oven, as well as gluing and putting it all together. Working together was the best part. When we all "put our heads together," we came up with some awesome stuff! "Three heads are better than one!" Using some tools was also fun, such as the paper cutter and saw. We also had fun interacting with other groups. We would sometimes give each other some advice, or help each other by saying things like "you have something on your back" or "you might want to move your hand before I cut my paper." You know, for safety reasons.
Oven 11
Our solar cooker is called the pizza box solar oven. It is a box cooker. We chose this design because it was straight forward, we got to add our own unique touch, and most of all it looked awesome!
We learned that it is not easy, because while building, if we didn't have the right measurements it didn't work out. We discovered that solar energy can be used for all sorts of things! In the design, we added many things to it like extra panels so it could bounce off more heat. These panels included many challenges because it was hard to find the right materials and the measurements.
Something that was fun and exciting was working together as a group, because while working we had lots of fun! The things that were exciting were using the different types of machines for the very first time!
Oven 12
Our cooker is a very large box cooker. It has all four sides and a triangle shaped flap inside. All of the sides have tin foil, which reflect light. Our cooker is foldable and portable. We used string and nails to hold the cooker up. We put tape on the nails to remove the sharpness.
We learned that it is hard to work as a group when different people want two different things. It is hard to build things when they don't always stand up straight. It is also confusing to focus light into one place.
It's cool that the cooker is portable and also it was interesting to work with your friends. It was really cool to understand how you can direct solar energy to one place.
Oven 13
Clearly, this solar cooker is much smaller than the others, but it makes it much more portable and lightweight. The main aspects are an open cooker, foldable, and small. We chose this design because of these very reasons. It is more practical for use and storage. We tried to explore the aspects of an open cooker since most of our fellow classmates chose to explore the box cooker. The angles of our solar cooker are designed to reflect to one area, where the food shall be cooked.
We found out that mathematics were much involved in the instructions of this design. This included measurements, angles, and problem solving. The problems we encountered included: finding the right angles, the last panel which we had to support, keeping the glue from tainting the tin foil, and making it more portable and foldable. Our group read over our plans and studied the images to estimate the angles. We made a stand to support the last panel. To keep the glue from decreasing the reflective power of the tin foil, we used glue sticks to attach the foil to the cardboard. We made it more foldable by making tabs (so it folds), therefore making it portable.
This was exciting because we had a new learning experience, which opened our eyes to different ways of constructing. Our problem solving skills increased because of the problems we encountered and how we were able to solve them. This activity required us to put our creativity into use. Our group also got the chance to use new Design and Technology machines we haven't gotten to experience before. Overall, we had a lot of fun with making this solar cooker.
Oven 14
Our solar cooker is called the pizza box solar, we chose this design because it looked good. We got to add our own unique touch, and it looked good!
While building our solar cooker, we learned that it is not that easy, because if we didn't have the right measurement, it didn't work out in the design. We added some stuff to it, like extra things, so it could bounce off heat.
Something that was fun and exciting was working together, because we had fun using different machines and other stuff. We had fun!
Oven 15
Our solar cooker uses aluminum foil mainly to easily reflect light and use it as an advantage. It will take the heat and reflect it onto the food making it cook. We put 2 layers of aluminum foil for extra heat and we also put 2 layers of black since black absorbs a lot of light and heat.
We learned that to make this project it took a long time. It required a lot of teamwork and responsibility. We tried cooking potatoes and milk and they turned out to look very appetizing. This was just a test but now we are ready for the actual test that Mr. Smith will give us. We worked hard on it and we recommend that you choose it!!!!
The fun parts about working on this was the teamwork. We worked together really well and we also had a fun time. As a group what we think was the most fun/exciting thing about this project was working on the machines!!!!!!

Fletcher's Creek Senior Public School, Grade 7
Brampton, ON

Building solar powered ovens was a great way to end our grade 7 heat unit. All of the information on particle theory, radiation, conduction, heat absorption, and energy conservation was put to use for this project. In teams of 4 to 6, students built and tested their solar powered ovens. Twice, they made modifications to try to reach the goal temperature of 175 degrees Celcius. The teams added more insulation, as well as more black paint, and finally they ended up wrapping the top of the panels in plastic wrap in an effort to trap all the heat inside their ovens. Unfortunately, they couldn't reach a temperature high enough to bake cookies, so our class made s'mores. Some students never had s'mores before, so it was a new experience, and the ovens did a good job melting the chocolate chips and making the marshmallows nice and soft.
Class 707 decided that next time they would like to try baking in the ovens in the warmer spring months instead of the colder fall months, and on a day with no wind.
Class 707 learns best when they can get their hands on something. They really enjoyed building the ovens and were able to explain how they worked using correct science terminology. It was an exciting way to start the year.

Hunter's Glen, Grade 4 and 5 
Scarborough, Ontario

HG chefs cooking everything under the sun

Part of the eco class (12 grade 4 and 5 students) at Hunter's Glen spent several early mornings building solar ovens following the re-energy.ca plan. Our class had been working on a variety of projects to show how eco-friendly our school is, and it was time for a new challenge. After studying renewable energy sources, the students set out at 8:00 on sunny days in April and May to see how powerful the sun really could be.
They worked in groups of 4 to build 3 ovens with the goal to prepare an appetizer, a snack and a dessert. We tried to bring new life to items found in the recycling bins throughout the school by collecting both the cardboard and newspapers from them. Once supplies were gathered, we were ready to create. We cut the cardboard following the plans from the website as closely as possible, with some quirky shapes as the end result. In an attempt to make the tinfoil straight, we tried putting glue on the cardboard versus the tinfoil and smoothing the foil with either our hands or a ruler. The smoothest results came from putting the glue on the cardboard and using a ruler to even it out. Our first attempt was brownies — donning our chef hats we headed out to the yard to test our ovens and our cooking skills. A little too much wind prevented our masterpiece from getting enough sun to cook completely, but the pan was still licked clean.
Our perfect sunny day did arrive, and we grabbed our ovens and ran. We decided the roof was where we would get the stronger heat that we needed, as it is closer to the source. This time, brownies and nachos were our goal. The wind tried to step in again but we got wise and used string to hold our ovens in place. We also learned how the angle of the oven had an effect since one oven worked much faster than the others.
A big food fest was had with nachos, cheese and salsa as the appetizer, and brownies for dessert. The chocolate brownies were the biggest hit and cooked so well that some of our faces got a little more on them then our mouths did. We are eagerly waiting for the next sunny day for our main course of sun-baked pizza. The chefs of Hunter's Glen are excited for the sun to strike again!

Jasper Place High School, Grade 10
Edmonton, Alberta

We completed the solar oven project as part of the science 14 Heat Transfer Unit for a Knowledge and Employability class. The class has 12 students and they worked together to build one solar oven. We spent an 80-minute period cooking nachos in the solar oven.
We learned about heat transfer — that solar energy can be used to cook food. It would have been better to have two 80-minute periods to have more time to cook more food. We should have used the black tray as it would have absorbed more energy to help cook our food. If we would have placed it in the cooking bag, it would have trapped more heat. Using less cheese might have helped as well. Following the plans and building the oven was also good for learning some math concepts.
They enjoyed the building process. The students were able to follow the plans and only needed some guidance.
Student comments: It was fun eating and cooking. It was fun making the oven. It was fun putting it together and also eating the nachos. We also played baseball while waiting for the ovens to cook as it took awhile for the cheese to melt.
The students would like to do it again and try to cook different foods.

Post Academy Homeschool,
Calgary, Alberta

The Post Brothers' Outdoor Kitchen
My brother and I (with loads of help from dad) built the solar oven that was on the re-energy.ca website. We chose this model because it looked easy to build and would capture a lot of the sun's energy. We decided to cook up a recipe called Corn Dodgers that is basically like a corn bread that you eat with maple syrup! Yum!
Building the oven was actually a lot harder than we thought. We wanted the tin foil to be really smooth, but we got some wrinkles. Using thick sturdy cardboard works best. Some of the challenges were:
Forgetting that it is a hot oven (ouch!)
Don't stand in front and block the sunlight.
It takes a long time to cook something and you could starve to death during that time period (just joking).
Keeping it aimed at the sun constantly.
It was fun building the oven. We thought it was really cool that you could cook in a box! Cooking with solar heat is a great way to use renewable energy. We also learned about countries that use this way of cooking all the time because they don't have electricity.

Royal Canadian Montessori
Whitby, ON

Solar Oven: A Muffin of a Project
During a project in which I ask my students to tell me "how I am going to change the world," my students were interested in decreasing electricity usage. They devised a plan which used solar power to power a household including an oven on solar energy collected and stored in solar panels affixed to a roof. They predict that in 20 years all households will use solar energy for a majority of their power needs. We undertook the Solar Oven Challenge to learn about solar energy and also to try to make an impact towards environmental change. The class split themselves into two groups, boys against girls, and each team tried to come up with the best oven. The girls made an upright oven. They used several boxes. They lined the bottom of a large box with tin foil. They added four sides that were placed in an open concept oven. Everything was on about 75 degree angle. They used a thin tin pie pan and a clear oven bag to retain the heat.
The oven did heat up quickly and the muffins were cooking. However, there was a snag in the plan when a gambit of clouds emerged and we had periodic cloud cover. The students discovered that they needed a constant supply of heat in order to have the muffins cook thoroughly. They focused their attention on trying to devise a better plan for heat absorption and retention. While we ate the muffins that were cooked simultaneously in the oven in the kitchen (just in case), we discussed ways that the students could concentrate the heat in a smaller chamber and also how they could partially bury the chamber in the earth to keep the heat in. They also threw around ideas of using a magnify glass to concentrate the heat. However, they reasoned that concentration of heat in an area might only burn the food not cook it properly so they thought they might try using the magnifying glass to heat a partially submerged chamber in water. They reasoned that the water might be better able to retain the heat. Overall, the model was sound but the sun's rays were unpredictable.
The students loved the hands-on experience and problem solving. The girls decorated the back of their oven with symbols and really personalized it. They were so proud of themselves, and they really had fun working together. They are already talking about what to do next year to make it better.

SATEC at W.A. Porter Collegiate, Grade 9
Toronto, Ontario

The purpose of a solar oven is to create an efficient and environmentally friendly way to cook food effectively. It is also a chance to create and design, leading to a gain in experience and a better understanding of the many alternate options we have.
The steps we followed:
  1. Gather all the required materials.
  2. Take apart one side of a cardboard box, and with the help of a ruler cut out four, large rectangles.
  3. Take aluminum foil and cover one side of the rectangle. To secure the foil in place, use tape and place it on the back.
  4. Open the flaps on one side of the second cardboard box, and carefully put each of the large rectangles on each of the sides, NOT ON THE FLAPS. The rectangles need to be long enough to reach to the bottom of the box.
  5. After taking plenty of strong duct tape, make sure that the remaining cardboard box's flaps do not move. Attach the flaps onto the backs of the rectangles, with the tape. Use additional foil to fill in gaps so that no rays can escape.
  6. Rip apart pieces of scrap paper, and toss them into the box. This results in the creation of the insulator.
  7. Taking a tin pan to be the baking chamber, gently place clear wrap on the pan. The pan will have dark metal pieces on it and black paint, surrounding the small plate which is to contain the food to be cooked. Take note that the metal parts could only be accessed with the help of a teacher. The tin baking pan must be taped into the baking chamber.
  8. Take a large, powerful light, and angle it toward the oven from a distance.
  9. Test the oven; wait till your food cooks and BEWARE OF THE HEAT! USE OVEN MITTS to prevent savage burns from occurring.
  10. After the food has cooled, enjoy the snack!
The heat energy enters by the sun's rays, and it is reflected by the aluminum foil toward the black tin pan in the cooking chamber, and is collected with the help of the insulation so the food can be cooked for a shorter amount of time.
I would change the beginning part of the design to slightly curve in the tops of each of the rectangle panels. I feel that it would be helpful if a reflective surface such as the aluminum foil could also act as a way to keep the rays inside the solar oven. The light will have even less of a chance to escape, and so there will be more heat to cook the food.
The sun's visible light is able to be collected by the beams reflected off the aluminum foil, and then directed in one concentrated direction, which is the cooking chamber. As black is a shade that does not allow much light to pass through it, it is best if the tin pan where the food is to be cooked is coloured black. Also, the heat can be absorbed and help cook the food.
The angle or position that is the most effective for generating heat in this solar oven is to have the baking chamber face up to the sun directly.
The solar oven can be used to keep foods warm, and heat up food that have become cold, or it can heat up water for a family to use for their daily needs.
The limitation of the oven is that it cannot operate if the sun is not there, and the weather is not able to display the sun constantly. During the course of the day, the oven ought to be moved around so that the maximum amount of heat and light it can gather is made available.
Our group cooked an egg in our solar oven. We broke the egg and placed it into the smaller aluminum pie plate inside the baking chamber. We took saran wrap and covered the baking chamber with it, because it would act as a screen to help keep pollutants out. As a result of our experiment (May 2009), our solar oven reached an astonishing temperature of 41 degrees Celsius.

St. Bonaventure, Grade 7,
Toronto, Ontario

As part of the unit Heat in the Environment, the grade 7 class split into groups and each group built a solar oven. Using many re-usable materials, the construction followed the instructions based on the example given; however, when insulating the cooking container, a lot more insulation was used (LOTS of shredded paper — although the students were worried about the possibility of setting it on fire during testing!).
The students realized that it would be good to cover all aluminum edges and corners with aluminum tape to ensure there would be maximum reflection and minimum heat escaping from holes and cracks in the solar oven. Painting the cooking chamber black was essential in absorbing as much heat as possible. The foil on the collectors had to be as smooth as possible — which was difficult to achieve because of the challenges with sticking it down efficiently. It was CRUCIAL that all measurements were accurate. The reflective panels need to be large so as to catch as much radiant energy as possible.
The construction of the solar oven was a lot of fun, and being able to modify the design during construction so as to iron out any imperfections was exciting because that is where the students became very creative. Testing out the oven in the snow in February was exciting because even at -10 degrees Celcius the best oven reached about 100 degrees Celcius. The competition between the different groups was interesting to watch as was the discussion about the best positioning of the oven towards the sun and whether it should constantly move with the sun.

St. Margaret's School, Grade 4 
Victoria, British Columbia

Oven 1
It is like a funnel that funnels the light from the sun to turn it into heat. On the bottom of the oven, we put egg cartons to insulate it. The food sits on top of the egg cartons so the heat will rise up from air spaces between the egg cups to cook the food. It has a plastic piece on top of the oven so that the light can go in, but the heat gets trapped. We painted the outside black so that it would absorb the light which turns into heat. The whole inside is covered in aluminum foil so that when the light goes in, it will keep reflecting off the sides until it gets absorbed in the bottom. This was a class project, and we worked in a group of five.
We learned that the plastic on top will let the light in but not let the heat out. It was hard for all group members to have something to do at the same time.
It was fun planning and making it. It was fun making smores.
Oven 2
We made a black oven so it would absorb heat. It has a tray inside to put the smores on because we don't want it to burn on the bottom. It has under-carpet as insulation underneath the tray to keep the oven warm. Along the inside of the oven, there is smooth aluminum foil to reflect the light onto the tray where the food is. Covering the top of the oven, there is saran wrap to keep the heat inside the oven like the windows of a greenhouse do. There is a door that opens, and the tray comes out with it. That is how you retrieve the food. This was a class project, and we worked in a group of five.
We learned about teamwork and how to decide on things while listening to each other. We also learned about ovens, greenhouses, and how to contain heat.
Planning the oven was fun. Putting it together was awesome. We like to problem solve.

St. Mark Separate School, Grade 3 to 6
Mississauga, ON

Oven 1: The Box
This was a solar oven group project for school. It's simply a box hence the name, The Box. This box has two magnifying glasses duct-taped together to magnify the light so it is focused on the food. The cooking chamber is insulated with styrofoam. The inside walls are covered with aluminum foil to reflect the light onto the cooking chamber which heats up and then cooks the food. The bottom is black to attract light. The brownies we baked were absolutely delicious.
We discovered that styrofoam is a good insulation and that teamwork is needed to make this a success. We learned that if one person goofs off, the entire project will fail. Tips for building are to calculate a good angel to project the light onto the food. Also you need to be able to enhance the heat so that it will actually cook the food. The one main challenge was the weather. We needed it to cooperate and be sunny. Other challenges were building and planning.
We had a lot of fun building and planning. The most exciting part was preparing the food and hoping that it will bake!

Oven 2
The solar oven that our group built has a very unique design. We started by making a stand for our design to sit on, after that, we constructed the body of the solar oven. The body consists of 12 panels all angled to reflect light to one point, our cooking chamber. On top of this, we have 6 more reflector panels on top to catch even more sunlight and reflect it onto the cooking chamber. This is called a parabolic design. All heat and light is directed to one place.
We learned that angles make a great impact on the outcome of the project, especially with a parabolic design like ours. If the angles are not correct, you cannot get all the heat you need to succeed. Also, the colouring of the cooking chamber is very important. Since black absorbs the most heat and gives off the most heat, you should always have a black cooking chamber. On top of this, we learned that it is very important for the aluminum foil on the reflector panels to be as smooth as possible. Otherwise, the heat and light will not be reflected properly and the cooking chamber will not get all the heat it needs to cook.

Some of the difficulties that we encountered during the project were:
Weather: On all the dates that we planned to test the ovens, it was always too cloudy or rainy.
Make sure that you use materials that do not melt when there is extreme heat.
Do not interrupt the cooking process, otherwise it could take twice as long.

The entire group agrees that the best part about making the solar oven was, of course, building it. It was a lot of work, but we did it all to the best of our abilities. Our favourite part about the building was putting aluminum foil on the reflector panels. We enjoyed applying each layer and gently smoothing it out wrinkle by wrinkle. We also had lots of fun making the batter for our muffins. But the best part about the whole experience was EATING when everything was done. All in all, our whole group had lots of fun and we came away with more knowledge and a great sense of accomplishment.

Oven 3: Solar Oven 4.491545 Dragon Slayer Edition
While we were building our solar oven, we learned that black absorbs heat and that foil reflects sunlight into the cooking box. It is important to work together as a group. Some challenges were with the weather. When we were ready, it was either cold, windy, overcast or raining.
It was fun when we were building the solar oven. The best part was when we were baking the mini muffins in the solar oven. Overall, the group had lots and lots of fun. Everyone in our group was working together and we had no problems. It was a good learning experience.

Oven 4: LI Bakery Solar Cooker 2009
We made solar ovens as a group project. Our group name is Fried Bunnies. Our solar oven is covered with black paint on the outside, and inside, it's covered with tin foil (to reflect the light into the cooking chamber) and insulation (foam and bubble wrap). Basically, it looks like four panels that are specially angled, mounted on a big, rectangular box.
SOC 2009We learned that solar ovens can actually work, and they can heat up to a really hot temperature, if you use the right materials. Ours went right up to 70 degrees Celsius! Also, we learned that we had to be very careful when using the dangerous materials... one of our group members learned that... the hard way. To add to all our challenges, Mother Nature wasn't cooperating with us. We had to wait for a week until the weather was right for cooking!
A fun experience was shopping for the ingredients. We had never been "out" with each other and it made a good memory. Cooking was also really fun. We baked Spritz, a.k.a. some type of cookie, and lime shrimp kabobs. But of course, eating the food was the best!

St. Rene Goupil/St. Luke, Grade 4 and 5,
Thornhill, Ontario

Our project goal was to cook in a more efficient, renewable way using solar ovens. This project included cutting, pasting and patience. Our solar ovens had four panels, two big and two small. They had a cardboard box at the bottom and a black painted tinfoil container to attract heat. In our groups, we each chose a recipe and used it in our solar ovens. In conclusion, making the solar ovens was one of the most enjoyable and educational experiences we've had this year.
Each group provided one sentence about the tips or challenges they experienced:
Some people didn't contribute as much, however, we still succeeded.
We learned that solar ovens need to be positioned in the right position in order to work.
We discovered that reading instructions was the most important and tricky part.
We discovered/learned that the solar oven is difficult to build and getting the correct measurement is hard.
We learned to cook food by using the sun's heat, reflecting on the solar panels.
Each group felt that cooking the food and being successful was the most exciting part of this project. The food made included hot dogs, smores, and garlic bread. The satisfaction of seeing and tasting the cooked food made the activity a lot of fun!

Timberlea Public School, Grade 7
Fort McMurray, Alberta

Wrapping up the Winter with Solar Ovens!
As part of the grade 7 science unit on heat and temperature, the students created their own solar ovens. Different forms of energy were examined. The solar ovens were a great way for the students to get hands-on experience with alternate sources of energy and their potential uses. The students were given the plans provided by re-energy.ca and were sent to work! The solar oven that reached the highest temperature was selected for submission. In this case, the highest temperature reached was 105 degrees Celsius in only an hour and a half!
Through trial and error many discoveries were made including the following:
  • it is the air that is warmed so it is important to use a bag around the food to trap the air and not let it out of the cooking area the solar oven must be angled properly to allow for maximum exposure to the sun's radiant heat the thermometer must be inside the bag to properly measure the temperature
  • having a shiny cooking tray reflects some of the heat instead of absorbing it, use black and dull
  • if you use cookie dough it may slide down your tray because you have to angle it towards the sun.

The students had a great time building and testing their ovens! Even though it was a chilly day of only 4 degrees Celsius, the students were eager to keep checking on their ovens to record the temperatures as they went up and to see how their food was cooking! It was really exciting to see the students discussing their projects with the younger students who came out for their recess break while we were testing. The projects drew a lot of attention from both students and teachers alike!

Vaughan Secondary, Grade 7
Vaughan, ON

Oven 1: Pizza Box Solar Oven
We used a pizza box. We put aluminum foil on the bottom of the box to attract heat for the food. We also used plastic wrap to contain the heat in the box. We put our food — crackers, marshmallows and chocolate chips — at the bottom to cook. It was the right size, neat and clean. Also, our solar oven was very stable.
We learned that tin foil and black tape attract heat and that plastic wrap traps the heat. We also learned that you need to put the oven on the right angle to work properly. We could have used bigger pieces of chocolate and marshmallows because our smaller pieces melted quickly.
We used crackers instead of graham crackers so it was the right proportions. Also, the chocolate was really melted and the marshmallows were hot. The food tasted really good, and everyone got to have a piece of our s'more cake!
Oven 2: Waffle Box Solar Oven
Our solar oven was a big square waffle box. We used tinfoil to attract the sun's heat and newspaper as an insulator. This paper was a good way to keep the heat in our box. We learned that the tin foil made the box very hot. Also, we learned that you can make simple food using natural energy. It also was a bit harder than initially expected, and there were some difficulties with the placement of the tin foil.
Our solar oven was different because everyone made s'mores or grilled cheese. We made a healthy snack with chocolate on banana's, strawberries and apples. Also, eating our chocolate fruit was good and tasty!
Oven 3
Our solar oven was made out of cardboard and panels lined with aluminum foil. We put lots of newspaper around the bottom to keep in the heat. We also used black construction paper to attract the heat and make our food cook.
We learned that the sun is needed as solar energy to make the solar oven work, and the sun can be used to cook food. Also, we learned about the importance of team work and how everyone should have a part in making the oven and that everyone should bring in at least one food item to cook.
We got to make and then eat our food! Our solar oven looked good and we had a lot of fun making s'mores in the solar oven!
Oven 4: Grill Cheese Maker
Our solar oven was surrounded by a cage of tinfoil and our food was placed on a piece of black construction paper.
Everything was pretty good up until we placed the black construction paper. That stuck to the bread because we buttered the both sides of the bread.
Something fun was showing how we could serve our own food and not waste energy. It is just cool knowing we can actually use what we have learned about alternative energy and put it to good use.
Oven 5
It looks like a great solar energy box. The plastic contained the heat in the box, cooking our grilled cheese nicely. We placed the panels properly, and we had plastic wrap on the top of the box to keep in the heat. The newspaper absorbed the heat.
We learned that food in a solar oven really can cook! The plastic was the most important part because it kept the heat in. We also learned that the solar oven was a great way of converting energy from the sun without using man-made material. Even though it is a longer process of making food, it helps the environment.
The food was made nicely because the bread was crispy and the cheese melted. The food tasted good because the bread was toasted as the plastic cover kept the heat in. It was fun to enjoy the food and was a successful project!
Oven 6: Chocolate Melter
Our solar oven had aluminum foil and a tin tray at the bottom. We placed a white bowl on the tray, lined with black construction paper to cook our food. We used a cardboard box as a base of the solar oven, and we created four cardboard panels wrapped in aluminum foil that were able to capture the sun's rays.
We learned that the solar oven was very slow in melting and heating our food. It took to about 200 degree Celsius for the food to be melted.
We accomplished our goal of making chocolate covered marshmallows. What makes our recipe different is the fact that we heated our marshmallows and chocolate chips instead of heating them with crackers.